

Installation Best Practices
High-performance products require high-performance installation. Explore the best practices that help exterior systems perform as designed for years to come.
Fiber Cement Siding System Best Practices
Proper installation is just as important as selecting the right siding product. Even the highest-quality fiber cement siding can underperform if critical flashing details, moisture management components, clearances, and penetration details are overlooked. The following installation best practices are based on James Hardie® installation requirements, building science principles, and field-proven methods designed to maximize durability, weather resistance, appearance, and long-term performance.
1. Wall Preparation & System Planning
Build the Foundation for Long-Term Performance
Every successful James Hardie® siding installation begins long before the first piece of siding is fastened. Proper moisture management, wall preparation, layout planning, and material handling help create a durable exterior system designed to direct water down and out of the wall assembly.
Moisture Management
Proper moisture management begins with a continuous drainage plane and properly integrated flashing details.
Best Practices
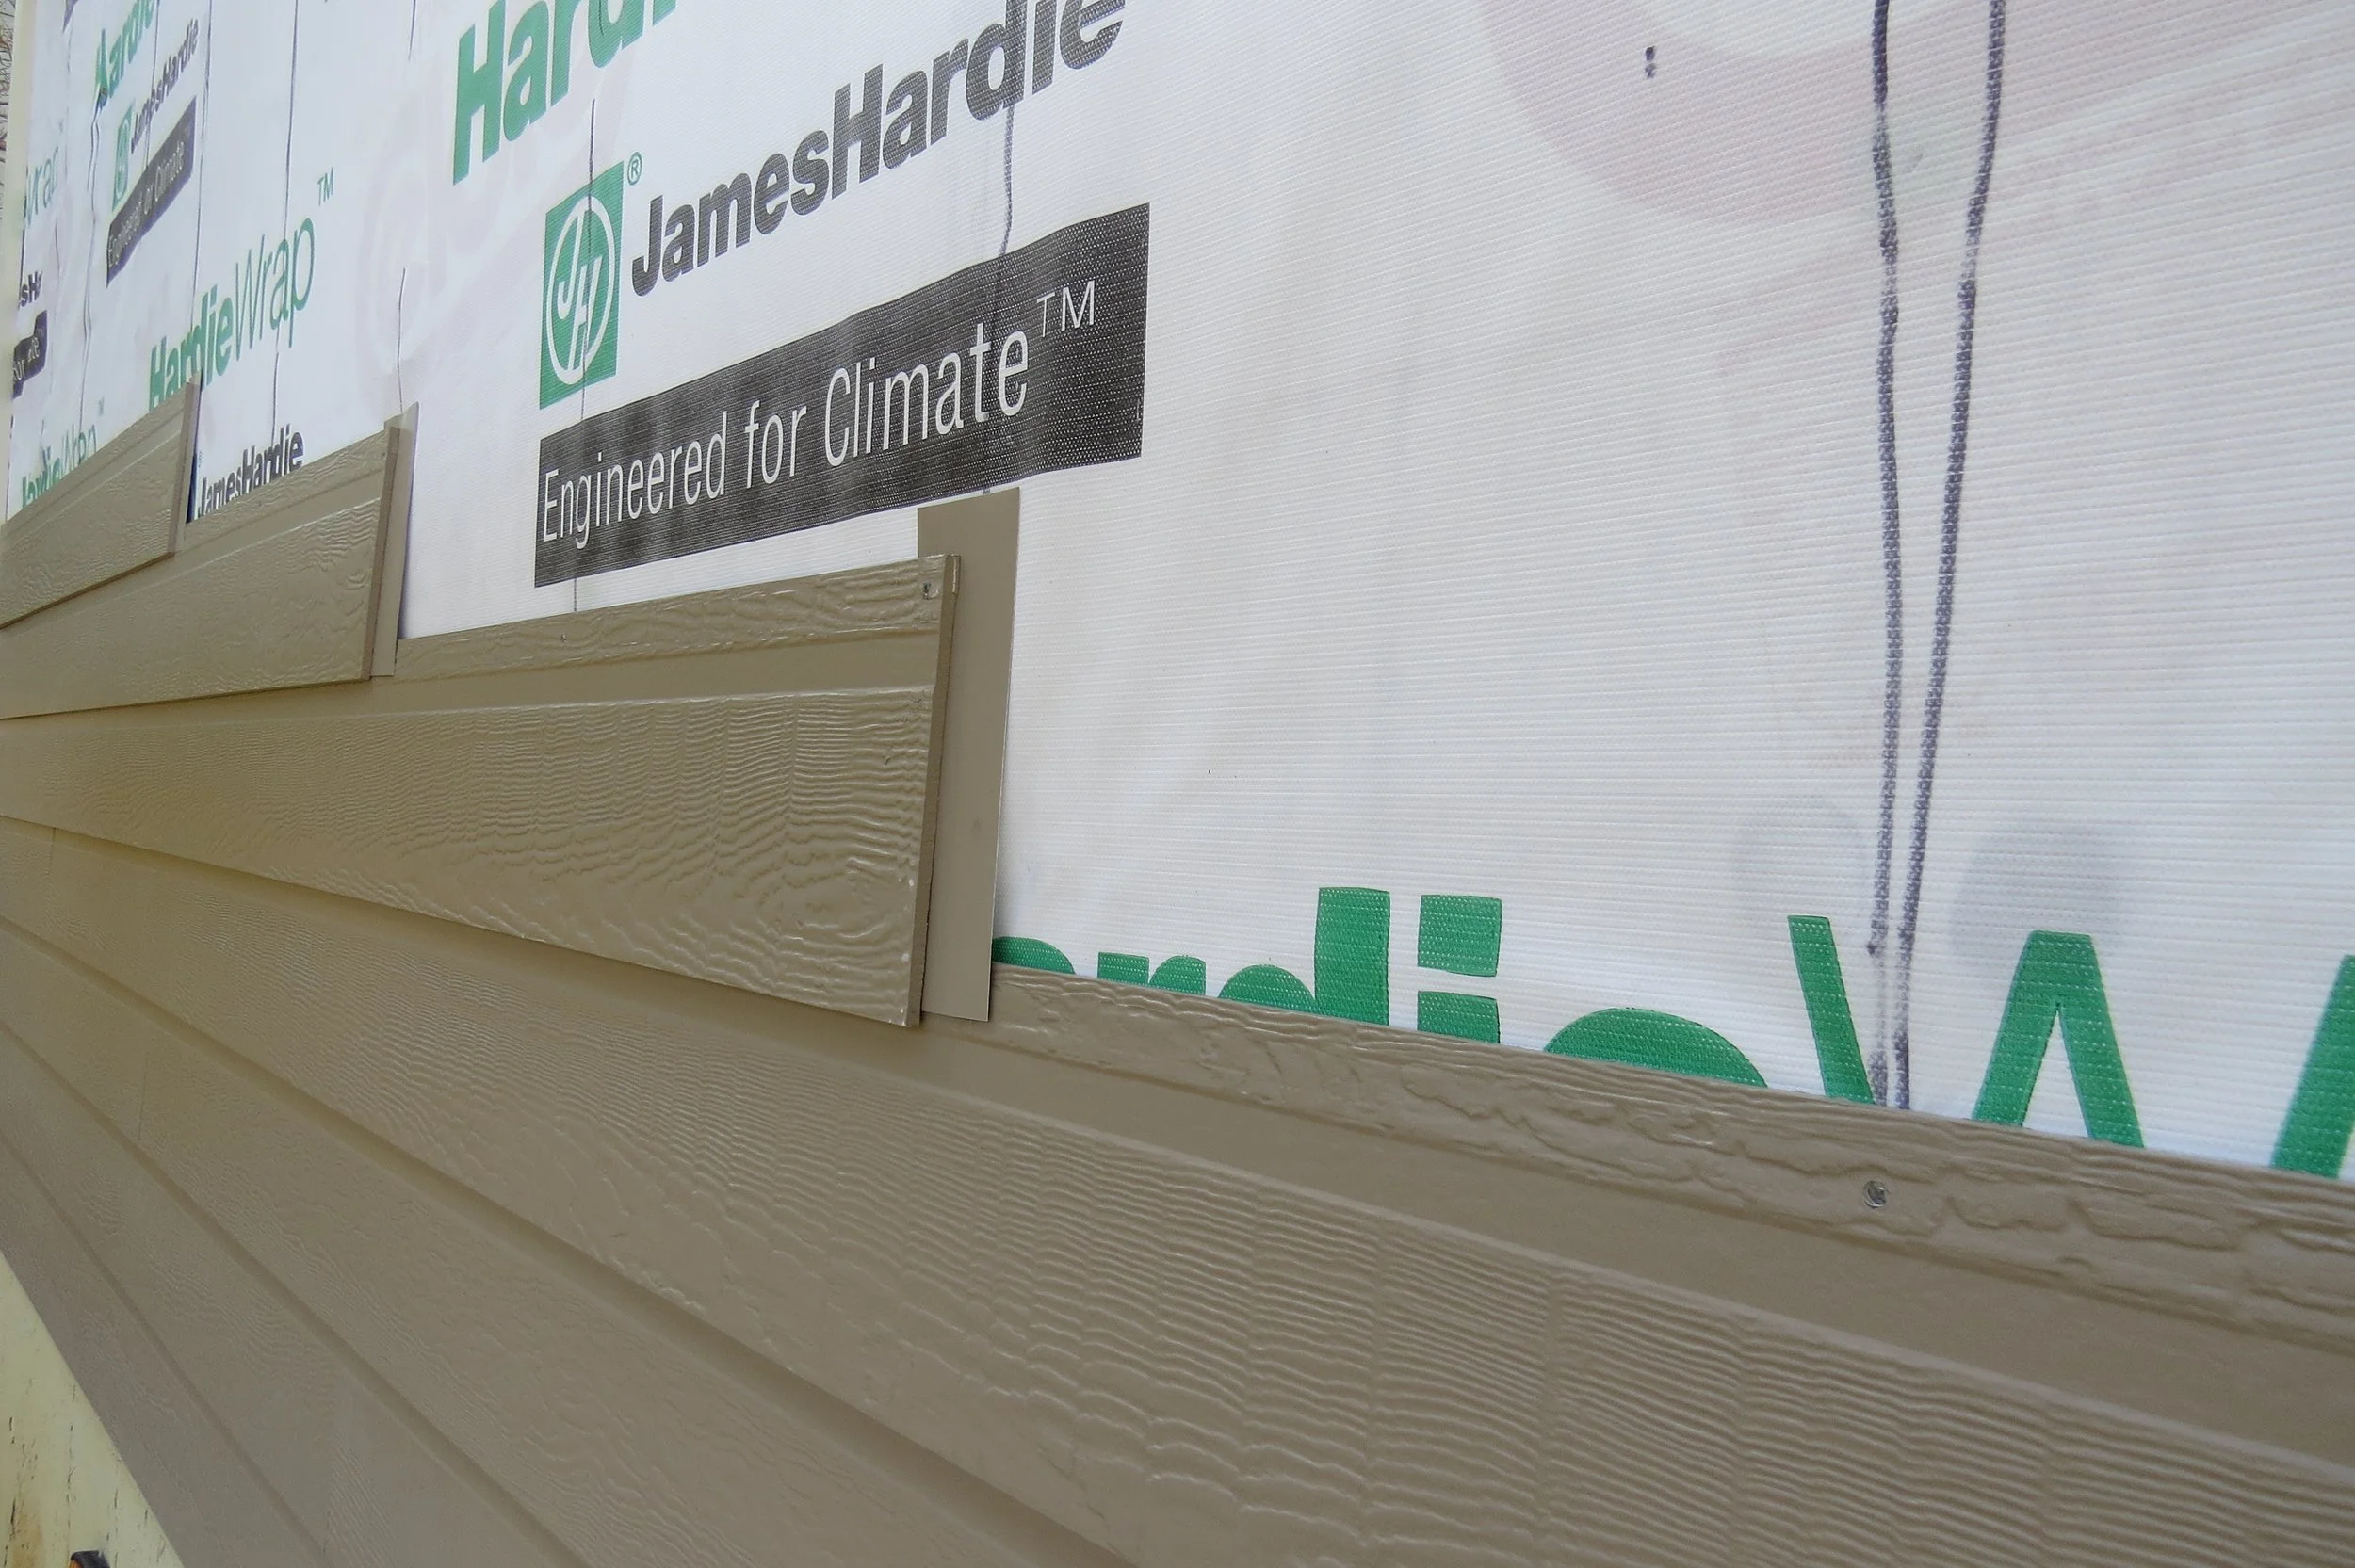
Install a code-compliant weather-resistive barrier (WRB).
Properly tape and seal WRB seams.
Integrate all flashing components with the WRB in a shingle-fashion sequence.
Properly seal wall penetrations.
Maintain continuous drainage pathways behind the siding system.
Follow all James Hardie® clearance requirements.
Direct water down and out of the wall assembly.
When using James Hardie® products, the weather-resistive barrier should be installed in accordance with applicable building codes and manufacturer instructions, including HardieWrap® Weather Barrier installation requirements when applicable.
Framing & Sheathing
The finished appearance of fiber cement siding is only as good as the wall assembly beneath it.
Best Practices
Verify walls are flat, plumb, and structurally sound.
Correct bowed or uneven framing before installation.
Ensure sheathing is securely fastened.
Address protruding fasteners and surface irregularities.
Confirm WRB installation is complete before siding begins.
Irregular framing, sheathing, or wall conditions can telegraph through the finished siding and negatively impact appearance and performance.
Layout Planning
Professional siding installations begin with careful planning before the first piece is installed.
Best Practices
Establish consistent reveal dimensions throughout the project.
Align courses with windows, doors, and architectural features.
Avoid small "sliver" courses whenever possible.
Verify starter strip placement and first-course elevation.
Plan butt-joint locations in advance.
Maintain consistent alignment across wall transitions.
Confirm trim, soffit, and frieze board dimensions before installation.
Proper planning improves appearance, reduces material waste, and creates balanced sight lines throughout the project.
Material Storage & Handling
Proper storage and handling help protect product quality, maintain factory finishes, and support a successful installation.
Best Practices
Keep materials dry prior to installation.
Store products off the ground and protected from weather exposure.
Store materials flat on pallets or other approved supports.
Carry lap siding on edge to help prevent damage.
Use two people when handling panel products whenever possible.
Protect ColorPlus® Technology finishes from damage during handling and storage.
Allow saturated materials to dry completely before installation.
Proper storage and handling practices help maintain product performance, appearance, and long-term durability.
Complete Exterior System
The highest-performing James Hardie® siding installations are built around five core building science principles:
Deflection
Drainage
Drying
Durability
Integration
When siding, trim, flashing, weather barriers, penetrations, roofing details, gutters, and ventilation systems work together as a complete exterior system, the result is a more durable, lower-maintenance exterior designed for long-term performance.
2. Fastening, Cutting & Siding Installation
Install for Strength, Stability & Appearance
Proper fastening and installation techniques help ensure fiber cement siding performs as intended while delivering a clean, professional appearance.
Fasteners & Fastening
Best Practices
Use corrosion-resistant fasteners approved for fiber cement siding.
Fasten siding into approved framing or structural substrates.
Follow manufacturer fastening requirements and local building codes.
Drive fasteners flush without overdriving.
Correct underdriven fasteners before proceeding.
Improper fastening can lead to movement, visible defects, reduced weather resistance, and shortened service life.
Cutting Techniques
Proper cutting methods help maintain clean cuts, protect product quality, and reduce exposure to respirable crystalline silica dust.
Best Practices
Use approved fiber cement cutting tools and blades.
Utilize dust-control measures and HEPA collection when practical.
Follow OSHA silica dust requirements.
Follow current James Hardie® cutting instructions.
Proper cutting practices help protect installers while maintaining the quality and appearance of the finished installation.
Butt Joints
For HardiePlank® lap siding:
Best Practices
Install flashing behind every butt joint.
Use durable, waterproof flashing material.
Extend flashing behind the joint and overlap the course below.
Do not caulk butt joints.
Avoid aligning butt joints vertically from course to course.
Maintain consistent staggering throughout the wall.
For optimum appearance, James Hardie® recommends a four-course, 32-inch butt-joint stagger pattern whenever possible.
3. Roofs, Gutters & Roofline Transitions
Manage Water Where It Matters Most
Roof intersections and roofline details are among the most common locations for moisture-related siding failures. Proper flashing, drainage, and clearances help protect the building envelope by directing water down and out of the wall assembly.
Roof-to-Wall Intersections
Best Practices
Install self-adhered membrane where required.
Install step flashing at every shingle course.
Integrate flashing with the WRB.
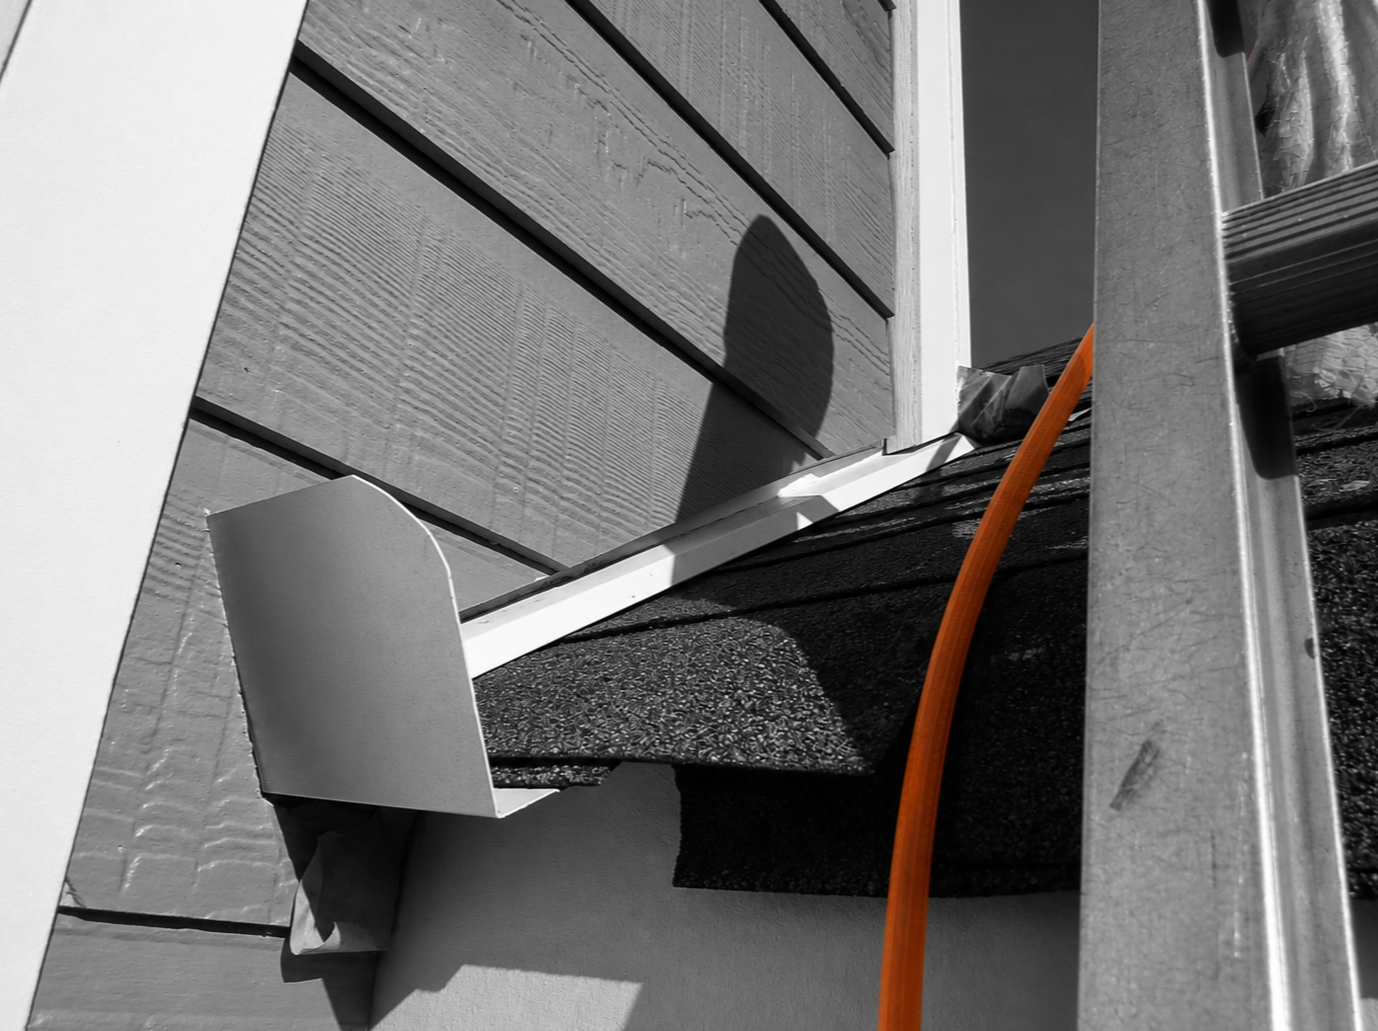
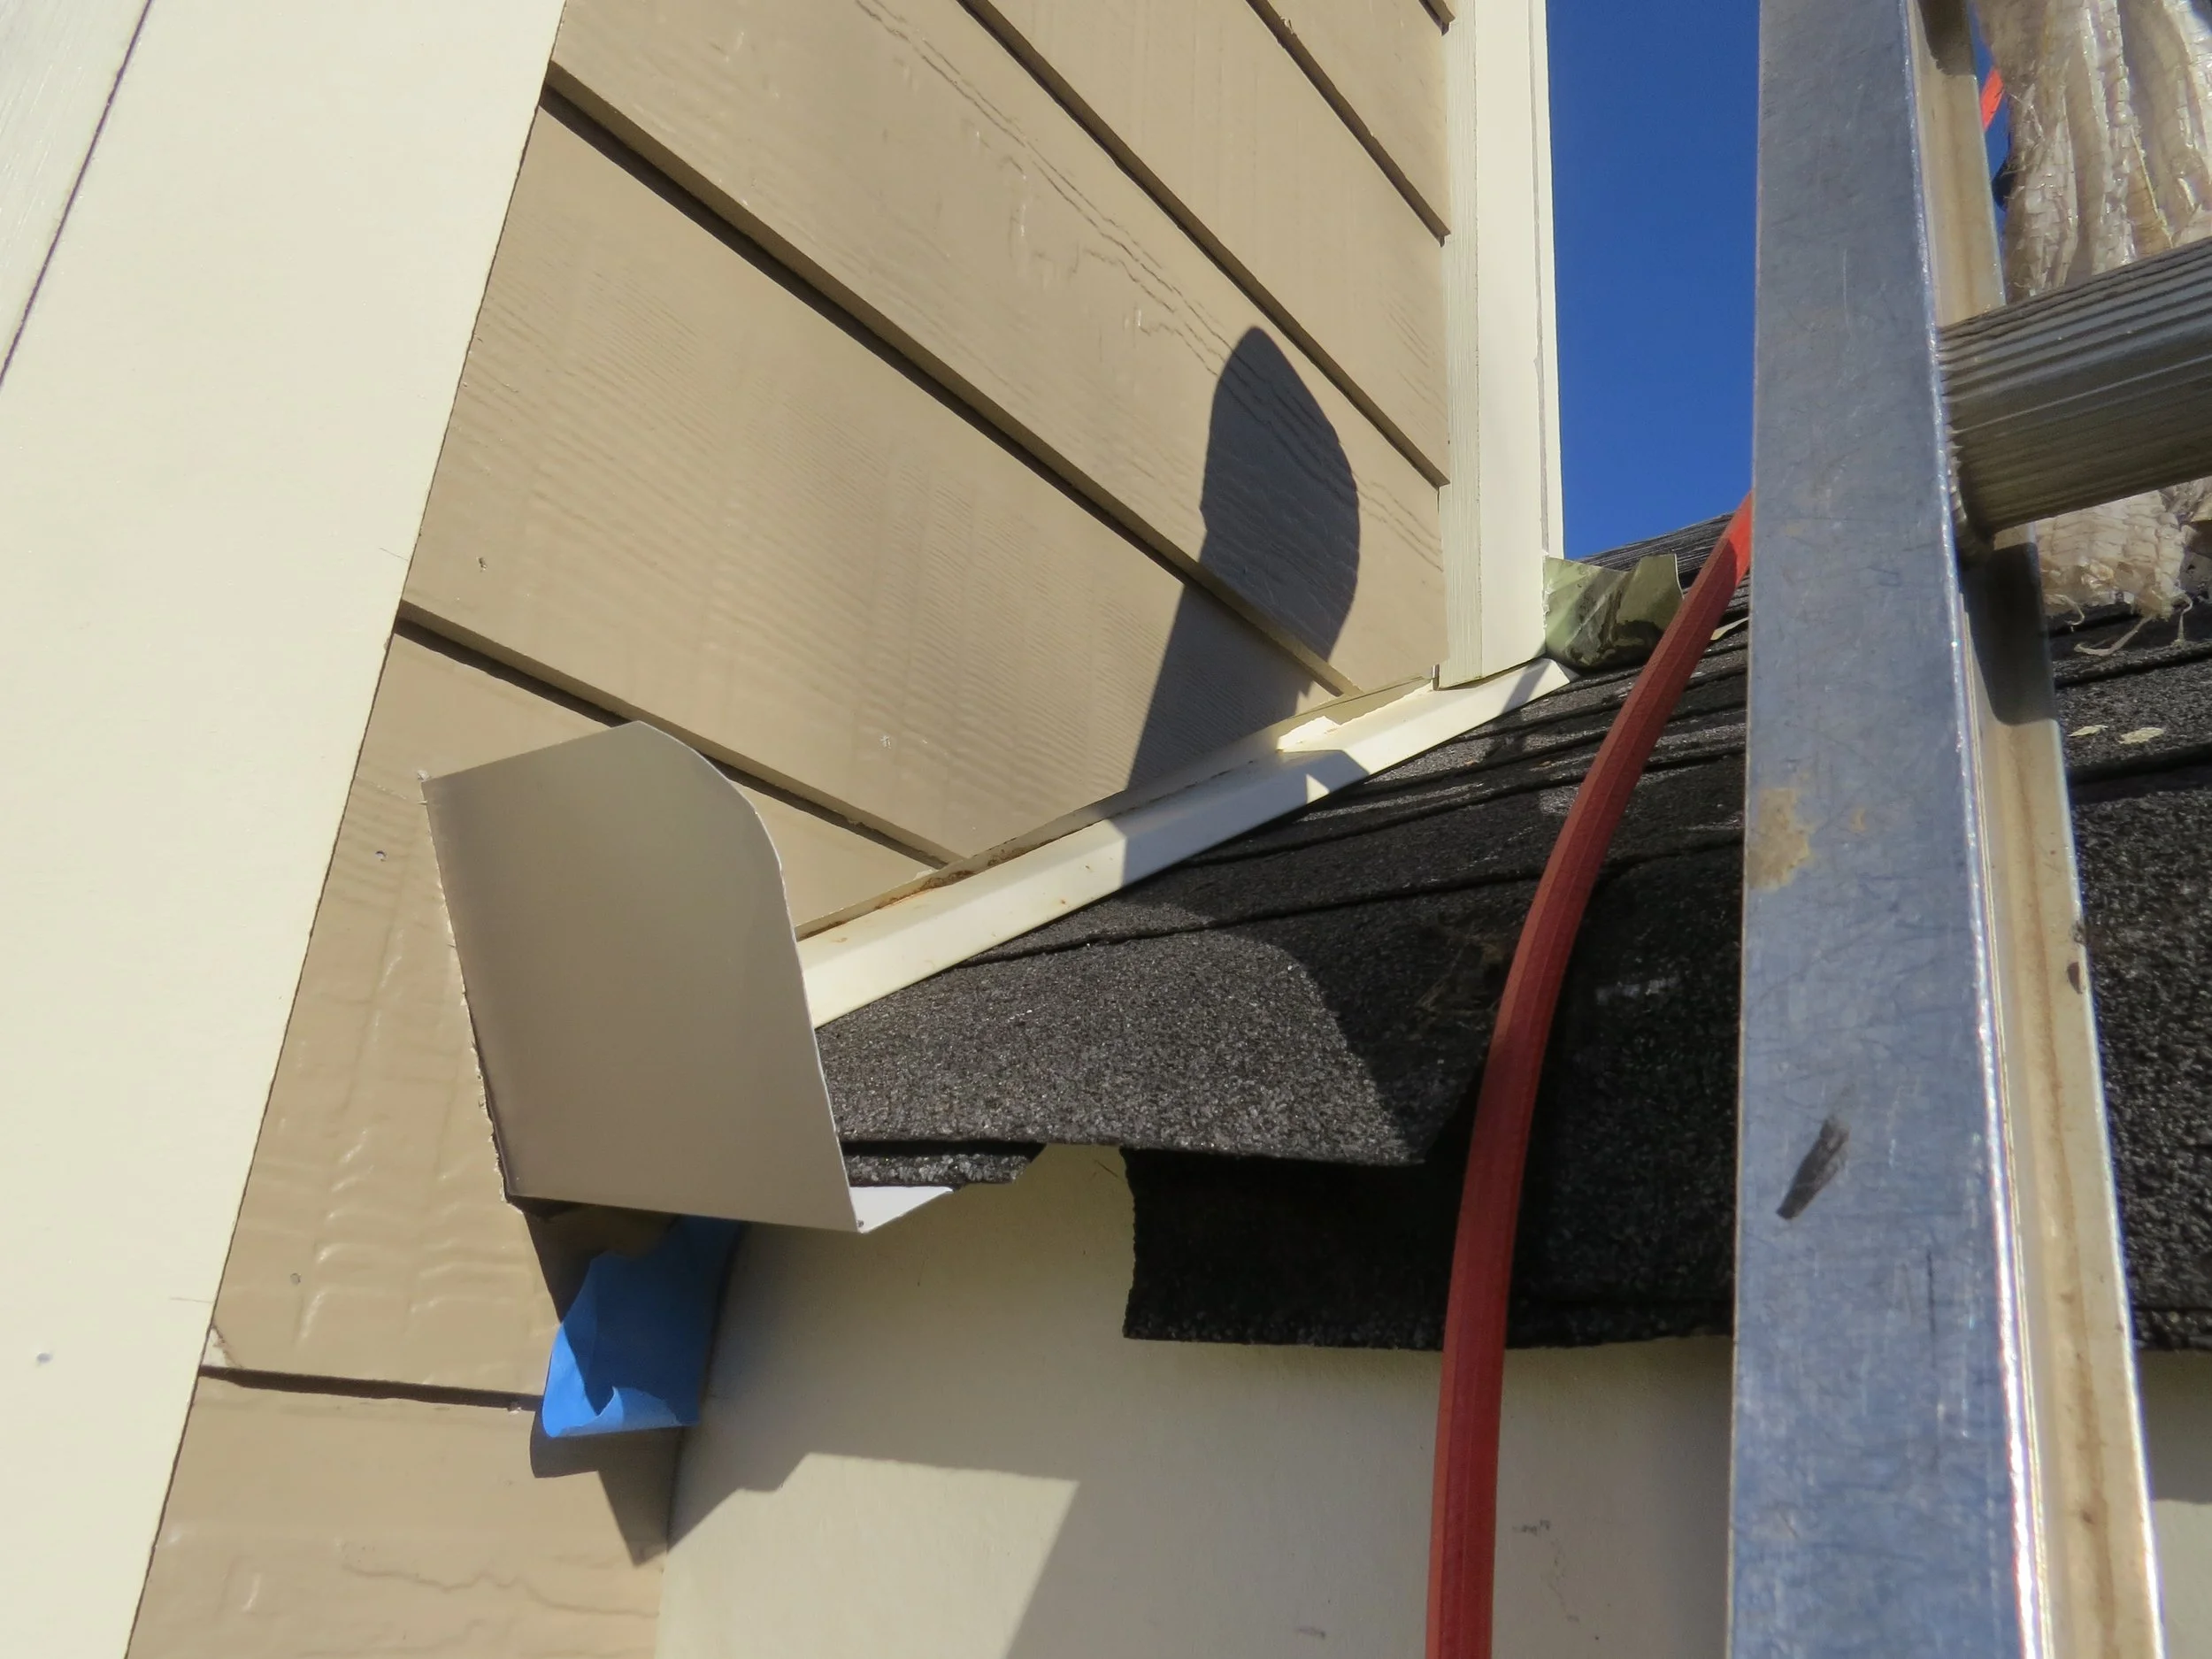
Install kickout flashing at all roof-to-wall terminations.
Kickout flashing should:
Be a minimum of 4 inches by 4 inches.
Include a 100°–110° bend.
Direct water into the gutter system.
Prevent concentrated roof runoff from entering the wall assembly.
Siding-to-Roof Clearances
Best Practices
Maintain a minimum 1–2 inch clearance between siding and roofing materials.
Install step flashing where required.
Integrate flashing with the WRB.
Seal all field-cut siding edges.
Direct water safely away from the wall assembly.
Roof Valleys
Best Practices
Install valley flashing where roof planes intersect.
Extend shingles a minimum of 1 inch beyond the fascia when gutters are present.
Promote positive drainage into the gutter system.
Prevent concentrated water discharge against wall surfaces.
Gutter Integration
Proper gutter management plays a critical role in protecting the building envelope.
Best Practices
Maintain a minimum 1-inch clearance between siding and gutter components, including gutter end caps and gutter termination points.
Install kickout flashing above gutter termination points.
Ensure gutters, roofing, and flashing work together as a complete drainage system.
Maintain positive gutter slope.
Keep gutters free of debris.
Prevent gutter terminations from discharging directly onto siding or trim.
When properly integrated, gutters help manage large volumes of roof runoff and reduce the risk of moisture-related damage.
4. Grade & Surface Clearances
Keep Siding Away from Moisture Sources
Proper clearances help prevent moisture wicking, splash-back, debris accumulation, and premature deterioration.
Soft-Grade Clearances
Maintain a minimum:
6 inches above finished grade
6 inches above soil
6 inches above mulch
6 inches above planting areas
Hard-Surface Clearances
Maintain:
1–2 inches above concrete slabs
1–2 inches above patios
1–2 inches above sidewalks
1–2 inches above stoops
1–2 inches above steps
1–2 inches above deck surfaces
For deck applications:
Install Z-flashing above ledger assemblies.
Maintain proper drainage pathways.
Direct water away from the wall assembly.
Masonry Transitions
Fiber cement siding and trim should not be installed directly against masonry materials.
Maintain proper separation from:
Brick
Stone
Concrete block
Stucco
Mortar surfaces
Best Practices
Install flashing where fiber cement transitions to masonry.
Integrate flashing with the WRB.
Seal all field-cut edges before installation.
Maintain manufacturer-recommended separation clearances.
Proper separation and flashing help prevent moisture transfer and support long-term system performance.
Covered Areas
A covered condition is generally defined as an area that is:
No more than 10 feet below a roof overhang
At least 4 inches horizontally inside the roof edge
For fiber cement products installed under cover:
Best Practices
Maintain a minimum 1/4-inch clearance above horizontal surfaces.
Install flashing where required.
Keep drainage pathways open.
Allow assemblies to dry properly.
Even covered areas can experience wind-driven rain and moisture exposure, making proper drainage and drying essential.
5. Flashing, Openings & Penetrations
Protect Vulnerable Areas of the Building Envelope
Every transition, opening, and penetration should be designed to direct water down and out of the wall assembly.
Horizontal Transitions
Examples include:
Belly bands
Water tables
Horizontal trim transitions
Architectural trim elements
Best Practices
Install flashing above trim.
Maintain a 1/4-inch drainage gap.
Do not caulk between siding and flashing.
Preserve drainage pathways.
Windows & Doors
Windows and doors are among the most common locations for water intrusion when improperly detailed.
Best Practices
Integrate flashing with the WRB.
Install flashing above all windows and doors.
Install flashing above horizontal trim components.
Maintain a 1/4-inch drainage gap above flashing.
Leave approximately a 1/8-inch caulked gap between siding and vertical trim where required.
Follow shingle-fashion installation principles.
Maintain continuous drainage pathways.
Large Penetrations
Examples include:
Hose bibs
Dryer vents
Furnace vents
Exhaust vents
Electrical boxes
Light fixtures
Mechanical penetrations
Large conduits
Best Practices
Install trim blocking around penetrations.
Flash above blocking.
Integrate flashing with the WRB.
Maintain drainage pathways.
Extend vents away from the wall when practical.
Avoid vent locations directly beneath soffits when possible.
Utilize weather-cut trim details where required.
Small Penetrations
Examples include:
Electrical wires
Cable penetrations
Small conduits
Small pipes
Best Practices
Seal penetrations with approved sealants or foam.
Maintain WRB continuity.
Prevent bulk water intrusion.
Flashing Materials
Flashing materials should be:
Corrosion resistant
Waterproof
Compatible with fiber cement products
Avoid:
Raw mill-finished aluminum flashing
Materials that may react with fiber cement
Flashing materials that may stain surrounding surfaces
Painted or coated flashing materials are generally preferred.
6. Finishing & Final Protection
Preserve Appearance & Long-Term Durability
Proper finishing procedures help protect James Hardie® siding from weather exposure while maintaining appearance and curb appeal.
Field-Cut Edge Protection
Every cut made during installation creates an exposed edge that should be properly protected.
Best Practices
Follow the current James Hardie® installation instructions applicable to the product being installed.
Ensure exposed cut edges remain clean and dry before applying touch-up products.
Handle ColorPlus® Technology products according to manufacturer recommendations.
Avoid damaging factory-applied finishes during installation.
Finishing & Painting
Best Practices
Follow manufacturer recommendations for all painting and finishing procedures.
Ensure siding is clean, dry, and properly prepared.
Use high-quality exterior coatings designed for fiber cement products.
Protect all exposed cut edges.
Follow recommended drying and curing times.
Inspect finished surfaces before project completion.
ColorPlus® Technology
For James Hardie® products with ColorPlus® Technology:
Best Practices
Protect the factory-applied finish during handling and installation.
Remove protective laminate film in accordance with manufacturer recommendations.
Follow manufacturer recommendations for field-cut edge treatment.
Use only approved ColorPlus® touch-up products and apply only where recommended.
Avoid excessive touch-up applications that may create visible finish variations.
Proper finishing practices help preserve appearance, protect exposed surfaces, and support the long-term durability of the James Hardie® siding system.